Layer Management
Layer management is performed primarily from the SkylineGlobe Server Manager's Layers page. Management activities include:
§ Publishing New and Updated Layers from a Server-Side Data Source
§ Adding and Editing a Layer's Alias
§ Deleting Layers from SkylineGlobe Server
§ Managing Deleted Layers (Permanently Deleting or Restoring)
Searching for Layers
To search for a layer:
1. From the SkylineGlobe Server Manager menu, select Layers. The Layers page is displayed.
2. If you want to search for layers whose property information contains a specific string (e.g., ID, Name, Data Source), do the following:
a. In the Search String field, type a search string or enter an attribute, condition, and value and click Insert String ![]() . The search expression is displayed in the Search String field.
. The search expression is displayed in the Search String field.
b. If you want to include additional strings in your search expression, select a connector: ![]() (And OR Or), and repeat step a for the next condition.
(And OR Or), and repeat step a for the next condition.
3. You can further filter your results by any combination of the following filters:
§ Type – Layer type (e.g., Feature Layer, Imagery Layer, TerraBuilder Project, TerraExplorer Project).
§ Group – User group of the layer's owner.
§ Owner – Layer owner. For SG Upload data sources, this is the name of the user who published the layer while for all sources other than SG Upload data sources, this is the user who was assigned owner of this layer's data source.
4. If you want to search according to geographic location, do the following:
a. Click Set Bounding Box, and select the required region by drawing a rectangle on the map on the right side of the page around the area to which the search is confined.
b. From the Map field, select one of the following:
· Do Not Use – To ignore the bounding box.
· Contained – If you want to search only for layers whose entire geometry fall within the bounding box.
· Intersect – If you want to search for all layers whose geometry intersect at any point with the bounding box.
c. If you want to clear the bounding box, click Clear.
5. Click Search. Your search results are displayed in the search results list at the bottom of the page.
Selecting a Layer Version
TerraExplorer projects (FLY layers) can be updated and saved back to SkylineGlobe Server while maintaining the same connection URL, using the "Update existing" publishing option. This ensures that users automatically get the latest version of the project. This option also maintains a history of all previous project iterations, offering the ability to revert to any prior version when necessary. In SGS Manager, you can select which version of a FLY layer should be served to TerraExplorer clients when loading the layer. By default, the latest version is served.
Layer aliases serve as an alternative method of updating layers and can also be utilized for other layer types. See "Adding and Editing a Layer's Alias" in the "Working with Layers" chapter for more information.
To select a layer version:
1. From the SkylineGlobe Server Manager menu, select Layers. The Layers page is displayed.
2. Right-click the row with the required layer, and select Select Version. The Select Version dialog box is displayed.
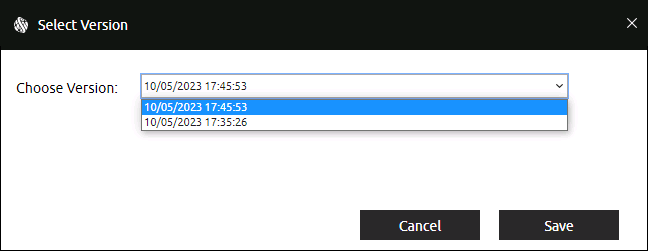
Select Version Dialog Box
3. Select a Version from the dropdown list, and click Save.
Publishing New and Updated Layers from a Server-Side Data Source
New or updated layers can be published to the server by scanning/rescanning their data source. SkylineGlobe Server scans the data folder or database and allows you to select which of its layers to publish.
To publish a new or updated layer from a server-side data source:
1. If the layer's data source was not yet added, add the data source. See "Adding Data Sources" in the "Working with Data Sources" chapter for information.
2. If the data source was already added, edit the data source. See "Editing Data Sources" in the "Working with Data Sources" chapter for information.
3. When setting the data source properties, note that the View Access and Edit Access set will determine the view and edit access for the layer(s) you are publishing or republishing (with your changes).
4. Click Scan Now.
Note: An owner must be assigned to the data source before it is scanned. Only an owner or administrator can modify layer properties.
5. The data source is automatically scanned and the Scan Results are displayed with a list of all files found in the data source and the following layer information:
|
Parameter |
Description |
|
Type |
Layer type. |
|
Status |
Layer status: § Existing – Previously scanned layer that was not modified. § Updated – Previously scanned layer that was updated. § New – New layer in the data source. § Deleted – Previously scanned layer that was deleted. Note: The layer's ID on the Layer list does not change when a layer is rescanned even if updates were made to the layer. |
|
Name |
Layer name. |
|
Relative Path |
Location of the layer file. The path is relative to the layer's data folder. |
|
View Access |
The view permission level for this layer, i.e., the users that have been granted view access (None, Only Me, My Group, Everyone, or Selected List). Users with valid view access for a layer can list, view and load the layer (opened from TerraExplorer Desktop, TerraExplorer Fusion, WFS/WMS clients, etc.). If you want to grant access to selected groups, see "Granting Edit or View Access to Selected Groups" in this chapter for information. |
|
Edit Access |
The edit permission level for this layer, i.e., the users that have been granted edit access (None, Only Me, My Group, Everyone, or Selected List). In addition to loading the layer, users with edit access can also perform layer transactions from TerraExplorer Pro and any WFS-T client. If you want to grant access to selected groups, see "Granting Edit or View Access to Selected Groups" in this chapter for information. Note: Only the owner and the administrator can modify layer properties. |
|
Size |
Layer size. |
6. The leftmost column of the Results table displays the default and recommended action for each of the layers, which directly correlates to the layer's status:
§ No marking – Do not update the SkylineGlobe layers with this change (for previously scanned layers that were not modified).
§ P – Publish/update layer to SkylineGlobe Server (for new and updated layers).
§ X – Delete the SkylineGlobe layer (for deleted layers).
7. Modify the default actions as required, and click OK.
Note: All property changes that you made will be applied to all selected layers.
Editing Layer Properties and Permissions
To edit a layer's properties:
1. From the SkylineGlobe Server Manager menu, select Layers. The Layers page is displayed.
2. Right-click the row with the required layer, and click Properties. The Layer Properties dialog is displayed.

Layer Properties Dialog
3. Edit the properties as required:
|
Property |
Description |
|
General |
|
|
Layer ID. |
|
|
Name |
Name of the layer. |
|
Description |
Additional text about the layer. This version extends functionality by allowing you to also pass additional parameters using the Description property field. These parameters will override the global settings for the particular mesh layer: § To serve 3D Tiles in glTF 2.0 format with Draco compression, for reduced size and better streaming, enter the following: "[draco=true]". If Draco compression was set for all site layers, and you want to override that setting for this layer, enter the following: "[draco=false]". Note: To set Draco compression for all site layers, select/clear Use Draco Compression in the Settings page. § To reproject the 3DML's elevation values, enter the following: "[convertz=true]". § I3S/SLPK layers are streamed in WGS84 Coordinate System + EGM96 geoid height. By default, the elevation values are not reprojected, but rather copied as is. To reproject the elevation values from the source vertical datum to EGM96, enter "[convertz=true]". § 3D Tiles are streamed in ECEF coordinate system. By default, the elevation values are not reprojected but anyway declared as ellipsoid values in ECEF when delivered to Cesium. To reproject the elevation values from their vertical datum, to real ellipsoid values for compatibility with terrain that uses true ellipsoid elevation, enter "[convertz=true]". Note: If the required grid shift file was not bundled with your installation or the reference itself is missing from the WKT, see "Adding Grid Shift Files" in the "Basic Concepts" chapter for information. |
|
Key words or terms associated with the layer. If adding multiple tags, they should be semicolon delimited. |
|
|
Type |
Layer type (e.g., TerraExplorer Project Web, TerraExplorer Project Mobile, Feature Complex, Feature Polygon, Raster Complex). |
|
Data Source |
Name of the data source that defines connection information to the layer's data store (Read-only). Click View to view or modify the data source properties. See "Editing Data Sources" in the "Working with Data Sources" for information. |
|
Layer Path |
Location of the layer file (Read-only). The path is relative to the layer's data folder. Note: If editing an MPT layer for which the STRMI file is missing, a message is displayed that as a result of the missing file, WMS\WMTS services are unavailable. To generate the files, open the MPT layer in TerraBuilder and Prepare for Publishing. Then rescan the folder that contains this layer. |
|
File Size |
Size. |
|
Layer Category |
Category assigned to this layer. See "Using Layer Categories" in this chapter for more information. |
|
Layer Published |
Date and time (UTC +0) the layer was added to SkylineGlobe Server. |
|
Layer Modified |
Date and time (UTC +0) the SGS layer was last modified. |
|
File Created |
Date and time file was created. |
|
File Modified |
Date and time file was last modified. |
|
Public URL |
URL that clients use to connect to this layer on SGS. Note: This field is displayed only for project items: TerraExplorer Desktop, Web and Mobile projects and KML. |
|
Resources Folder Path |
The relative path of the uploaded data folder after publishing from TerraExplorer. Note: This field is displayed only for project layers, i.e. FLY, KML and mobile FLY). |
|
Coordinate Reference System |
Layer coordinate system. Click Edit to edit the coordinate system's reference system information, using either Well-Known Text (WKT) or EPSG code. Note: This field is displayed only for imagery, elevation, RasterComplex (MPT), feature (e.g., shapefiles), and 3DML layer types. |
|
Bounding Box |
The coordinates of a fixed rectangular area within which the loaded feature or imagery layer area is bounded. The coordinates parameters are as follows: § Top Left X and Top Left Y: The coordinates of the top left corner of the required bounding box. § Bottom Right X and Bottom Right Y: The coordinates of the bottom right corner of the required bounding box. Note: This field is displayed only for imagery, elevation, RasterComplex (MPT), feature (e.g., shapefiles), and 3DML layer types. |
|
Recommended Block Width |
Recommended geographic block width of the stream requests that are sent from TerraExplorer to SkylineGlobe Server. Select the block width in meters or kilometers. This field can have a large impact on the performance of both the clients and SkylineGlobe Server. See "Determining an Appropriate Block Width for Feature Layers" in the "Performance Tips and Guidelines" chapter for more information. Note: This field is only displayed for feature (e.g., shapefile) layers. |
|
Maximum Block Width |
The maximum size of a client request (larger requests will be rejected by SkylineGlobe Server). Setting this property appropriately prevents an excessively long wait for a client's request to complete. Note: This field is only displayed for feature (e.g., shapefile) layers. |
|
Encrypt Data |
Select the check box to encrypt saved cache files and blocks transmitted to the client. Only TerraExplorer can decipher this encryption, so no layers that are to be accessed by clients other than TerraExplorer should be encrypted. Note: This field is only displayed for feature (e.g., shapefile) layers. |
|
Permissions |
|
|
Owner |
For SG Upload data sources, this is the name of the user who published the layer while for all sources other than SG Upload data sources, this is the user who was assigned owner of this layer's data source. If you want to modify user properties, click View. Then modify the owner's user properties as required, and click Save. See "Adding Users and Setting User Properties" in the "Managing Users" chapter for information. |
|
View Access |
The view permission level for this layer, i.e., the users that have been granted view access (None, Only Me, My Group, Everyone, or Selected List). Users with valid view access for a layer can list, view and load the layer (opened from TerraExplorer Desktop, TerraExplorer Fusion, WFS/WMS clients, etc.). If you want to grant access to selected groups, users or sites, see "Granting Edit or View Access" in this chapter for information. |
|
Edit Access |
The edit permission level for this layer, i.e., the users that have been granted edit access (None, Only Me, My Group, Everyone, or Selected List). In addition to loading the layer, users with edit access can also perform layer transactions from TerraExplorer Pro and any WFS-T client. If you want to grant access to selected groups, users or sites, see "Granting Edit or View Access" in this chapter for information. Note: Only the owner and the administrator can modify layer properties. |
|
Cache |
|
|
No Cache |
Select the check box to prevent creation of cache files for this layer. SGS serves any client request according to the most recent layer information. This may result in some performance penalties. Cache is only created for 3D Tiles, feature layers in database data sources (Oracle Spatial, SQL Server, PostgreSQL or Esri ArcSDE), and DirectConnect projects. |
|
Cache Path |
Location of the layer's hard disk cache. Note: If No Cache was selected, this property is not displayed. |
|
Cache Creation Date |
Date cache was created. Note: If No Cache was selected, this property is not displayed. |
|
Clear Cache |
If you want to clear the cache, click the link. Only cache for mesh (3D Tiles) and feature layers can be cleared. Note: If No Cache was selected, this property is not displayed. |
|
Meta Tags |
|
|
View Style |
Metadata style format. |
|
Upload |
If you want to upload metatags, browse to the required file, and click Upload. |
Adding and Editing a Layer's Alias
Layer aliases simplify the layer update process, allowing for automatic and simultaneous application of changes across all projects that use a specific layer. When you want to update a layer/project, you can reassign the alias from the original layer to a new version of the layer. All TerraExplorer projects that have loaded this layer through the 'Load by Alias' option will automatically receive the updated version once the layer is refreshed. See "Loading SkylineGlobe Layers" in the TerraExplorer User Guide for more information.
In addition to their role in the update process, layer aliases facilitate the use of simpler names for projects/layers, leading to neater and more user-friendly URLs as opposed to more complex catalog IDs.
The alias is displayed in the Layer Name field in the SkylineGlobe Layers dialog, and layers can be searched according to their aliases.
Note: Layer versions serve as an alternative method of updating layers for TerraExplorer projects (FLY layers). See "Selecting a Layer Version" in this chapter for more information.
To add or edit a layer's alias:
1. From the SkylineGlobe Server Manager menu, select Layers. The Layers page is displayed.
2. Right-click the row with the required layer, and click Edit Alias. The Edit Alias dialog is displayed.
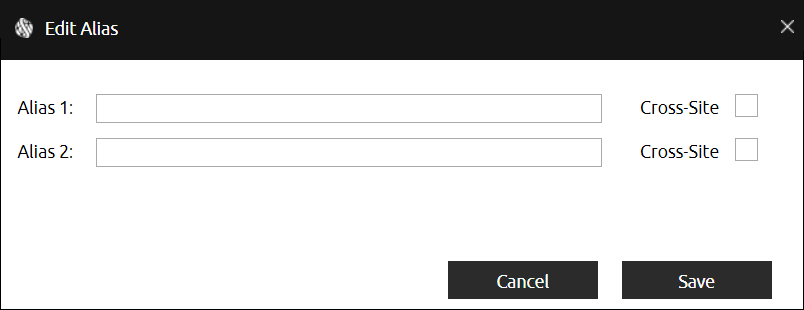
Edit Alias Dialog
3. Type an Alias 1 and/or Alias 2.
4. If you want to set an alias for all of the server's sites, select its Cross-Site check box.
Note: This check box is only displayed for super administrators.
5. Click Save.
Granting Edit or View Access
Edit and view access can be set for each layer, to determine which users will have permission to access the layer: None, Only Me, My Group, Everyone (public layer), or Selected List (of groups, users, or sites).
Users with valid view access for a layer can list, view and load the layer (opened from TerraExplorer Desktop, TerraExplorer Fusion, WFS/WMS clients, etc.). In addition to loading the layer, users with edit access can also perform layer transactions from TerraExplorer Pro and any WFS-T client.
When setting default permissions for a layer, you have the option to grant access to a Selected List of groups, users, or sites.
To grant edit or view access to a layer:
1. From the SkylineGlobe Server Manager menu, select Layers. The Layers page is displayed.
2. Right-click the layer, and point to Set View Access / Set Edit Access, and select any of the following: None, Only Me, My Group, My Site, Everyone, Selected List. Use Ctrl-click or Shift-click to multi-select layers.
3. If you want to grant access to selected groups, users, or sites, do the following:
a. Select Selected List. The Select Entities dialog is displayed.
b. In the Groups and Users tab, select the required groups/users.
c. In the Sites tab, select all the required sites.
d. Click OK.
Deleting Layers from SkylineGlobe Server
To delete a layer from SkylineGlobe Server:
1. From the SkylineGlobe Server Manager menu, select Layers. The Layers page is displayed.
2. Select a row with a specific layer, and click Delete. Use Ctrl-click or Shift-click to multi-select layers. The selected layer is deleted from the server.
Note: You can also right-click and select Delete from the shortcut menu.
Managing Layers Deleted from SkylineGlobe Server
Layers that are deleted from SkylineGlobe Server are no longer listed in the list of SkylineGlobe Server layers, but they can be restored to SGS, or alternatively, deleted permanently. When a layer from an SG Upload-type data source is permanently deleted, its source file is also deleted.
To permanently delete a layer from SkylineGlobe Server:
1. From the SkylineGlobe Server Manager menu, select Layers. The Layers page is displayed.
2. In the Search Results, click the Deleted Layers link. The Manage Deleted Layers dialog is displayed.
3. Select all the rows with layers you want to permanently delete, and click Permanently Delete. The layer is permanently deleted from SGS.
To restore a layer to SkylineGlobe Server:
1. From the SkylineGlobe Server Manager menu, select Layers. The Layers page is displayed.
2. In the Search Results, click the Deleted Items link. The Manage Deleted Layers dialog is displayed.
3. Select all the rows with layers you want to restore, and click Restore. The layer is restored to SGS.