Managing Data Sources
The following data source management activities can be performed from the Data Sources page:
§ Migrating TerraGate/SFS to SkylineGlobe Server
Editing Data Sources
To edit a data source:
1. From the SkylineGlobe Server Manager menu, select Data Sources.
2. Select the required data source, and click Properties. The Data Source Properties dialog is displayed.
3. Modify the data source properties as required. See "Adding Data Sources" in this chapter for information.
4. If you want to update the data source layers with these property changes, scan the data source. See "Scanning Data Sources" in this chapter for more information.
Note: This does not apply to SG Upload type data sources.
5. If you want to save the property changes without updating the data source layers, click Save.
Scanning Data Sources
When adding or editing a server-side data source, either SG Scanner type or from an Oracle Spatial, SQL Server, PostgreSQL or Esri ArcSDE database, SkylineGlobe Server scans the data folder or database and allows you to select which of its layers to publish. Whenever changes are made to this data source, it can be rescanned to update the server. See "Publishing New and Updated Layers from a Server-Side Data Source" in the "Working with Layers" chapter for information.
For more information on adding or editing a data source, see "Adding Data Sources" and "Editing Data Sources" in this chapter for more information.
To scan a previously added data source:
1. From the SkylineGlobe Server Manager menu, select Data Sources.
2. Right-click the row of the required data source, and click Scan Now.
Note: Scan Now is not available for data sources that are set for Auto-Scan. See "Adding Data Sources" (auto-scan parameter) in this chapter for information.
3. Click Scan Now. The data source is automatically re-scanned and the Scan Results are displayed with a list of all files found in the data source and their status (New, Existing, Deleted or Updated).
4. The leftmost column of the Scan Results table displays the default and recommended action for each of the layers, which directly correlates to the layer's status:
§ No marking – Do not update SGS layers with this change (for previously scanned layers that were not modified).
§ P – Publish/update layer to SkylineGlobe Server (for new and updated layers).
§ X – Delete the SkylineGlobe layer (for deleted layers).
5. Modify the default actions as required, and click OK.
Granting Edit or View Access
Edit and view access can be set for most of the data source types, to determine the default permission level for all layers from this data source: None, Only Me, My Group, Everyone, or Selected List (of groups, users, or sites).
Users with valid view access for a layer can list, view and load the layer (opened from TerraExplorer Desktop, TerraExplorer Fusion, WFS/WMS clients, etc.). In addition to loading the layer, users with edit access can also perform layer transactions from TerraExplorer Pro and any WFS-T client.
To set the edit or view access for a data source:
1. From the SkylineGlobe Server Manager menu, select Data Sources. The Data Sources page is displayed.
2. Select the required data source, and click Properties. The Data Source Properties dialog is displayed.
3. In the Connection Parameters section, select a View Access and an Edit Access. If you want to grant access to selected groups, users, or sites, do the following:
a. Select Selected List. The Select Entities dialog is displayed.
b. In the Groups and Users tab, select the required groups/users.
c. In the Sites tab, select all the required sites. This option is only available to super administrators.
d. Click OK.
Note: If you want to automatically grant access to future members who are added to a group, make sure to select the required group name in the Select Entities dialog. If only individual members in a group are selected, only they will be granted access, and not future added members (until access permissions are updated).
4. If you want to update the data source layers with these property changes, click Save & Scan to rescan the data source. See "Scanning Data Sources" in this chapter for more information.
5. If you want to save the property changes without updating the layers, click Save.
Deleting Data Sources
When a data source with layers is deleted, all of its layers are deleted from SkylineGlobe Server. These layers can later be restored to SGS, or alternatively, deleted permanently. See "Managing Layers Deleted from SkylineGlobe Server" in the "Working with Layers" chapter for information.
The data source itself is deleted permanently only if it is deleted after all of its layers were previously deleted. See "Deleting Layers from SkylineGlobe Server" in the "Working with Layers" chapter for information.
To delete a data source:
1. From the SkylineGlobe Server Manager menu, select Data Sources.
2. Select the required data source, and click Delete. Use Ctrl-click or Shift-click to multi-select sources.
Enabling SGS to Handle Old Requests from TerraGate and SFS
To enable SGS to handle requests that were previously handled by TerraGate, the following must be performed:
§ Binding of the IIS site where SkylineGlobe is installed to the same IP's and ports that TerraGate was previously bound to and unbinding of TerraGate from these IP's and ports.
§ Configuration of the IIS feature "URL Rewrite" to reroute all SFS and TG requests to SGS.
Configuring Site Bindings for Rerouting from TerraGate
To bind the IIS site where SkylineGlobe is installed to the same IP's and ports that TerraGate was previously bound:
1. Open IIS Manager, and in the Connections pane, select a site.
2. In the Actions pane, select Bindings. The Site Bindings dialog is displayed.
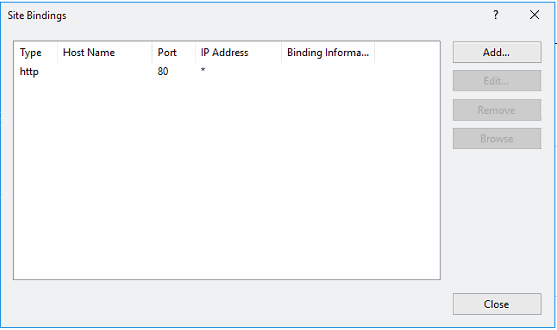
Site Bindings
3. For each IP and port that TerraGate was previously bound to, do the following:
a. Click Add. The Add Site Binding dialog is displayed.
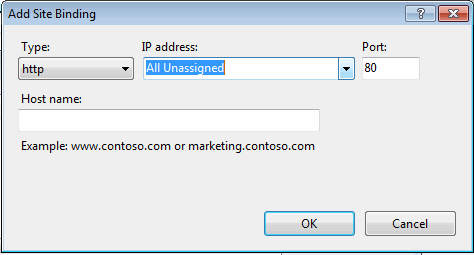
Add Site Binding
b. Enter the IP address and Port, and click OK.
Configuring URL Rewrite to Reroute Requests
SkylineGlobe Server installation automatically adds an IIS feature called URL Rewrite and configures it to reroute all SFS and TG requests to SGS. For standard TG/SFS configuration, no additional changes are required though it is recommended to verify that the URL Rewrite is working and review the rewrite conditions. If, however, the SFS/TG server had special configurations, e.g., your SFS application name was SFS2, the URL Rewrite conditions must be updated.
To configure URL Rewrite to reroute requests:
1. Open the website's IIS Manager and select the site, and then in the Actions pane, double-click URL Rewrite. The URL Rewrite dialog is displayed.
2. Review all rewrite conditions to verify they match your SFS/TG server configurations.
3. Set the same application pool for both your website and SkylineGlobe Server.
Note: You will require a known server configuration database security token to enable the new application pool user to connect to the database. If you do not know the token, you can generate one from the Settings page in SGS Manager. See "Setting SkylineGlobe Server Settings" in the "SkylineGlobe Server Settings" chapter for information.
4. If the same application pool cannot be used, edit the inbound rules under the URL Rewrite module in IIS Manger to change the action from Rewrite to Redirect.
Note: Changing Rewrite to Redirect results in in a performance penalty, and therefore should be avoided whenever possible.
5. Uninstall SFS.