Working with Presets
Build parameter presets make it easy to automatically set the required parameters to generate the optimum output for the project’s data as well as to share user-defined build settings between projects. New presets can easily be created by saving your build settings to a preset file. You have the flexibility to save all settings to the preset, or only selected ones. Presets only include changes from the default settings. This allows multiple presets to be selected for a build, each of which defines settings for a different subset of the build steps. If selected preset files have conflicting properties or flags, the value from the last file on the list is applied. Presets are managed (e.g., loaded, deleted, edited, and set as the default) from the Preset Manager.
Selecting Presets
To select presets for your build:
1. On the Home tab, in the Process group, click Build. The Build Parameters dialog is displayed.
2. Click the Presets tab, and then click Select and Manage. The Preset Manager is displayed.

Preset Manager
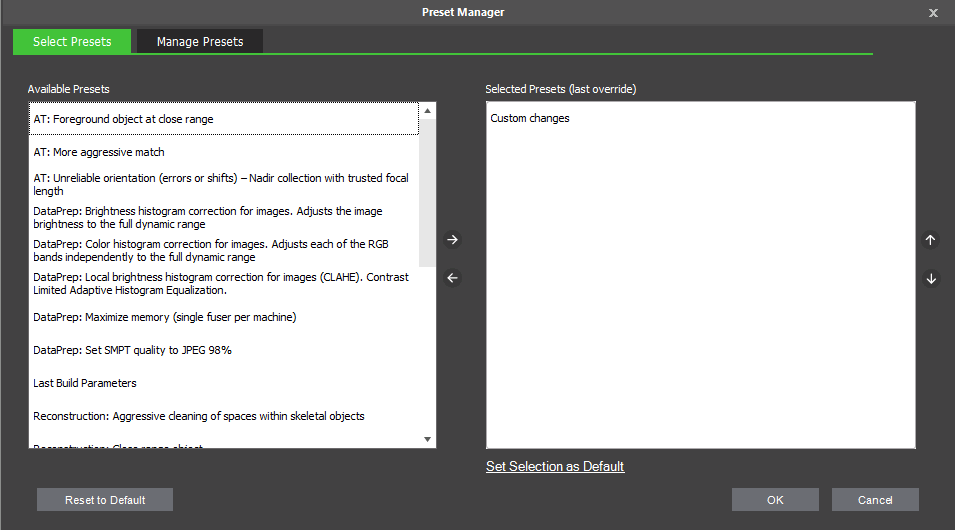
3. On the Select Presets tab, on the left side of the Preset Manager is a list of available presets. Select one or more presets from this list, and click Add ![]() . If you want to change the selected preset(s), use the Remove
. If you want to change the selected preset(s), use the Remove ![]() icon to remove a preset from the Selected Presets side. If selected preset files have conflicting properties or flags, the value from the last file on the list is applied. The selected Presets side also includes "Custom changes" with all custom changes that were made to AT, reconstruction, and output settings. The selected presets and custom changes are listed in the Preset section of the Build Parameters dialog.
icon to remove a preset from the Selected Presets side. If selected preset files have conflicting properties or flags, the value from the last file on the list is applied. The selected Presets side also includes "Custom changes" with all custom changes that were made to AT, reconstruction, and output settings. The selected presets and custom changes are listed in the Preset section of the Build Parameters dialog.
Note: The Last Build Parameters preset includes all the Build settings from the last build.
Note: The PhotoMesh Default preset is designed to provide optimal results for the majority of projects.
4. If you want to set your selections as the default presets for new projects, click Set Selection as Default.
5. If you want to clear your selections and restore the last saved default, click Reset to Default.
6. Click OK.
Loading a Preset from File
To load a preset from file:
1. On the Home tab, in the Process group, click Build. The Build Parameters dialog is displayed.
2. Click the Presets tab, and then click Select and Manage. The Preset Manager is displayed.

Preset Manager
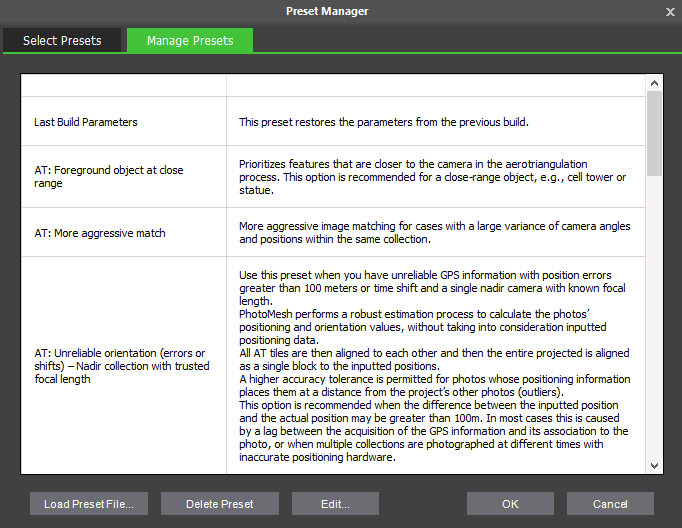
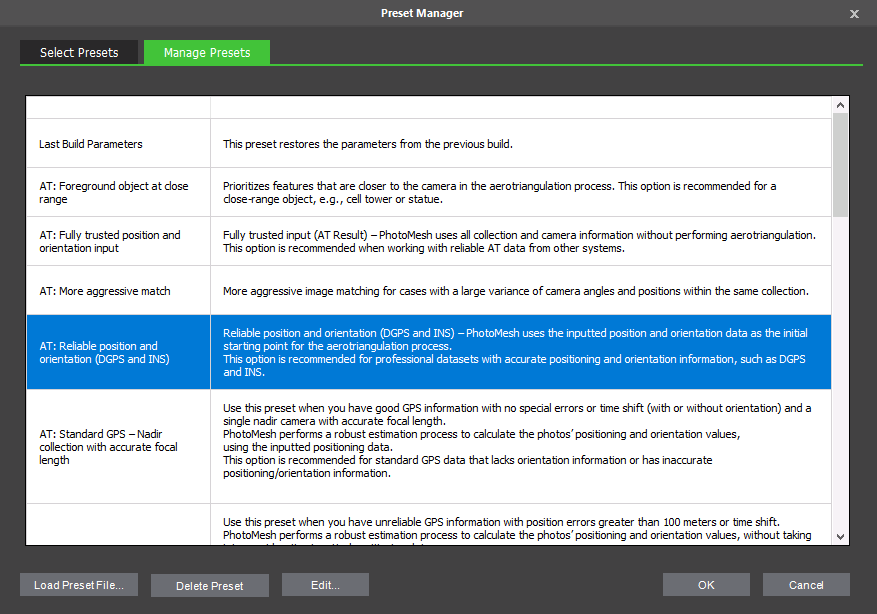
3. On the Manage Presets tab, click Load Preset File. The Load Preset from File dialog is displayed.
4. Browse to the required file, and click Open.
Creating a New Preset
A new preset can be easily created by saving your build settings to a preset file. You can save all your build settings, or only the settings from specific build steps. Only changes to the default settings are saved.
To create a new preset:
1. Set the build parameters as required. See "Setting Build Steps, Parameters, and Outputs" in this chapter for information.
2. In the Build Parameters dialog, click the Presets tab, and then Save as Preset. The Save Preset dialog is displayed.

Save Preset Dialog
3. Type a Preset Name for the preset and a free text Description.
4. Select the check boxes of the build steps whose settings you want to save in your preset file.
5. Click Save.
Deleting Presets
To delete a preset file:
1. On the Home tab, in the Process group, click Build. The Build Parameters dialog is displayed.
2. Click the Presets tab, and then click Select and Manage. The Preset Manager is displayed.

Preset Manager
3. On the Manage Presets tab, select the required preset from the list, and click Delete Preset.
Note: Built-in presets cannot be deleted.
4. Click OK.
Editing Presets
To edit a preset file:
1. On the Home tab, in the Process group, click Build. The Build Parameters dialog is displayed.
2. Click the Presets tab, and then click Select and Manage. The Preset Manager is displayed.

Preset Manager
3. On the Manage Presets tab, select the file you want to edit from the list, and click Edit. The preset XML file is opened in a text editor
Note: Built-in presets cannot be edited.
4. Edit the file in the text editor, and save your changes.
5. In the Preset Manager dialog, click OK.